


Remember when I showed you all of those awesome chalk board walls? Well, although we couldn't actually paint a whole wall with chalk board paint (because we are currently renting), my husband and I got creative and came up with a fun solution.
We happen to have a whole lot of empty vintage frames, collected from thrift stores and yard sales. There is one fairly large frame that has been sitting in our closet collecting dust. But, after seeing so many fabulous chalkboard walls, we came up with the perfect solution for it...create our own framed chalk board.
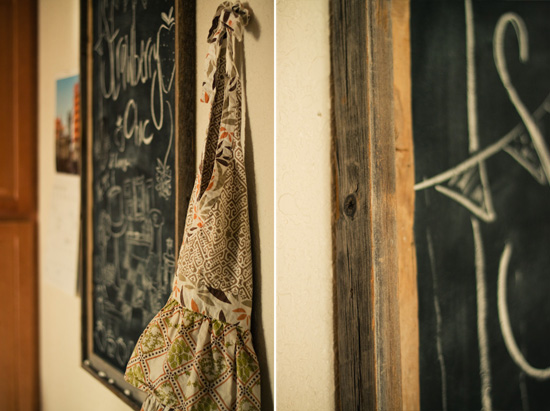
I really think the chalk board idea is genius. Not only do you get a handy place to doodle and jot down notes, it also creates a unique wall decor solution. I really like the look of chalk boards used kitchens and thought it would be quite functional for jotting down recipes and meal ideas. So, I decided to hang ours on the back wall of our kitchen...I love how it turned out!
Although I hung my chalk board in the kitchen, this idea would work great for any room. I'm actually thinking about doing a smaller grouping of 3 to hang in my little boys bedroom. I thought it would be fun to let him draw his own art on it, and kid art always turns out so cute!
This Framed chalk board took very little time and money to put together, for the tutorial click below!
Framed Chalk Board - Tutorial


Materials Needed
Empty frame
Sheet of 1/4" plywood (the size depends on your frame)
Chalk board paint, it comes in a can or spray type...we used the spray, it cost about $5 at Home Depot
Skil Saw
Chalk
Eraser
Step 1. Measure your frame to determine how big of a plywood sheet you will need. Cut the plywood accordingly and sand down any rough edges.
Step 2. Spray (or paint) your plywood with the chalkboard paint. Be sure to look over paint instructions, some applications may differ.

Step 3. After paint is completely dry, (you may need to wait 24hrs) Place plywood sheet into frame.

Step 4. Using the side of a piece of chalk, cover the whole board with chalk.


Step 5. Now erase all of the chalk, hang where desired, and draw a pretty picture!

i want one. tell abe to get on that for me.
ReplyDeletedefinitely going to do this! I discovered your blog tomorrow and it's just about my favourite already :) best DIY tutorials ever.
ReplyDeleteBeautiful decorations! We have been in our current home for four months now, and are definitely still working on this “decorating” thing. Secretly, I hope we always will be.
ReplyDeletevinilos decorativos