Learning the proper way to build a teired cake can be super useful when special occasions arise! I took a cake decorating class in college and learned many different cake decorating techniques that I use all the time. If you have the chance to take a class I would highly recommend it!
But if not, here is a tutorial on how to build your own 3-tier cake.
Building a 3-Tier Cake
You will need...
1 batch of buttercream icing
Glaze or thinned buttercream icing - for crumb coat
1 can raspberry filling, or other preferred filling
Cake platter
Large serrated knife, or professional cake leveler
Icing Spatula, can find here
Frosting bag, coupler, and large icing tip such as tip 12 or use the coupler without adding a tip.
(I actually used tip 2D, which works well also).
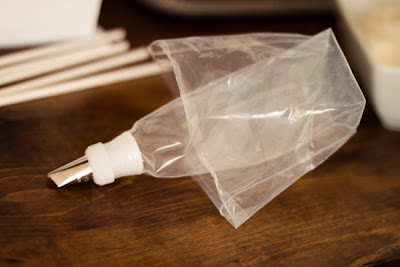
Step 1. Fill an icing bag with buttercream frosting, you will need to use a large icing tip, like a #12 or #2D for these next steps. If you have never filled this type of icing bag, here is what you do...
Cut the tip of your bag
Place coupler in the bag
Add the tip and twist on the cap (this picture is using an incorrect tip)
Fold the bag down
Fill with icing and twist the end of the bag to ensure icing doesn't leak out.
Step 2. Place a small amount of buttercream icing on your cake platter and smooth it out with a spatula, this will help keep the cake in place.
Step 3. Add your first layer of cake. (I did 3 layers of cake but only used two 8" rounds. The bottom layer is 1 full cake and the top two layers is the 2nd cake cut in half).
Step 4. Pipe a layer of buttercream frosting around the perimeter of the cake like a wall and fill with raspberry filling. You will need your frosting wall to be high enough so the filling doesnt seep through.
Step 5. Cut your 2nd layer of cake in half, making sure you cut nice and level (I used a seradded knife, seen below). Place the next cake piece on top of the raspberry filling and repeat the previous step. If your nervous about this step go Here to view Wilton's technique and video.
Step 6. Add the final cake layer.
Step 7. Now you will need to do a crumb coat, which will help hide imperfections and keep all of the cake crumbs in so they won't show through in your final design. For this cake I used a thinner lemon glaze for the crumb coat. But normally, you will use a watered down buttercream icing. Basically, all you do is frost a thin icing layer around the whole cake with an icing spatula. Then put it in the fridge until it sets (about 20min.)
If your feeling confused, HERE is a great video on how to crumb coat a cake.
If you are following along with the full Lemon Cake Tutorial continue to...
Part IV. Click HERE to learn how to frost your cake using the "Ruffle Technique."


Made this cake today and had no problems--except could have used a smidge more frosting. Beautiful cake and SO yummy! Definitely bookmarking this to make again. Thanks!
ReplyDelete