


Easter is one of my favorite holidays and is going to be here before I know it!
To my utter dismay, I have discovered that over the years my easter egg dying techniques have been somewhat lame. I usually just go to the store and pick up the regular old egg dye. I might even spruce things up a bit by drawing on the eggs with crayon before placing them in the dye (I thought I was so clever!).
I'm so disappointed in myself. I mean there are so many fun and different ways to die easter eggs and I have stuck with the lame boxed dye for years! So, this year I decided to think a little out of the box and do something different.
My Grandma has been dying easter eggs with onion skins as long as I can remember and they are absolutely gorgeous! I have always thought the process was long and complicated but this year I decided to give her a call and get the how-to. Turns out they're not as complex as I thought, and the materials are basically free! My grandma told me dying eggs with onion skins is something my family has been doing for many generations...(I am happy to know that I am helping to carry on the traditions!)


If you love these eggs as much as I do, then click below to get the full How-To!
Onion Skin Dyed Easter Eggs
Materials
Eggs
String or rubber bands
Onion skins - from yellow onions, the darker the better!
Small towels or rags (I used cut up old white t-shirt pieces about 5" square, they are much easier to work with when wrapping around the eggs).


Note: If you don't happen to have many onions laying around your kitchen you can do what I did... call up your local grocery store and kindly ask the produce person if they wouldn't mind setting aside a small box for you after they have sorted through them.
Step 1. Take one of your eggs and cover it with onion skin (the larger pieces of onion skin work best!).


Step 2: Place a second layer of onion skin around your egg (the box of onion skins I got didn't have many large pieces so I had to use many skins to cover my egg with at least 2 layers, but they still turned out great!)

Step 3. Wrap a rag around the covered egg and tie string around the wrappings (like it's a little present!). Continue this process until each egg is wrapped. You can use rubber bands to wrap around the egg instead of string, just be careful not to wrap them too tight!


Step 4: Fill a large pot with water and bring to a boil. Using a large spoon or spatula, carefully dip each egg into the water.


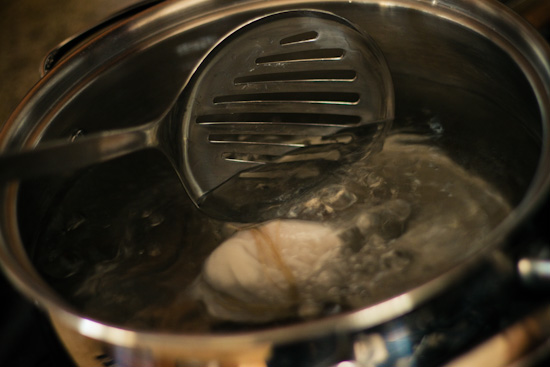
Step 5: Let the eggs boil for about 10 min. Watch the water color as the onion skins starts to dye the eggs...its pretty awesome.

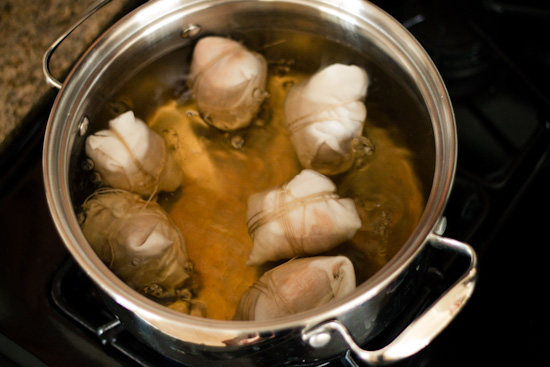

Step 6: When the eggs are done, fill a large bowl with cold water and carefully place in each egg to cool.


You will notice that the water in your pot has turned a beautiful dark amber color. You can use this water to dye more eggs if you would like!

Step 7: After the eggs have cooled enough to touch them, you can start to unwrap!
This part is super fun..each egg will turn out differently!


Congratulations, your done!
Your pictures are so beautiful!
ReplyDeleteI have never heard of this before. It is so cool!
Very cool!
ReplyDeleteI found this cute Easter tree. Thought you would like it...prob even find some way to make it even more cute!
http://naturallymeg.blogspot.com/
Gotta love Grandma's onion eggs. Have you tried her tie eggs? They are pretty sweet too!
ReplyDeleteThis is a fantastic idea. They're beautiful and not harmful to the environment.
ReplyDeletep.s. your photos are lovely. I'm your latest follower.
Cheers! Rambles with Reese
Oh don't worry Bryndi, the 'tie egg' tutorial is coming soon!
ReplyDeleteBeautiful! Such exquisite presentation for the delicately delectable egg! When pastels simply won't do...Love this idea! Thanks for sharing!
ReplyDeletexo-Julie
Haute Khuuture Blog
ooh love these! beautiful photos!
ReplyDelete